Support - CalDigit Online Troubleshooting Knowledge Base
|
|
First Published: 1/20/2016 Last Modified: 1/20/2016 Last Modified by: LL
Article ID:170
|
Summary:
Mac OSX may create an extra 200 MB EFI partitions at the start of a drive hence you may see this EFI partition in Windows. The Windows DIsk Management tool can’t delete these EFI partitions, and you’ll see the “Delete Volume” option grayed out. This article describes how you can clean these partitions in DOS command mode and re-format your CalDigit drive.
|
Products Affected:
HDPro & HDPro2, HDOne, CalDigit RAID Card, HDElement, CalDigit VR & mini, FireWire VR, S2VR HD, S2VR Duo, AV Drive & AV Pro, HDPro24, T3 RAID, T4 TBT2 RAID, Tuff
|
IMPORTANT NOTE: Following the procedure below will ERASE ALL DATA on the drive. Prior to following these directions, verify important data is stored securely on a different storage device.
In Windows, you can remove an EFI System Partition or GPT Protective Partition from a Drive that was previously formatted and used in Mac OSX by following the procedures below:
1. Connect your CalDigit drive to your Windows computer.
2. Open Disk Management: Control Panel -> Administrative Tools -> Computer Management -> Disk Management.
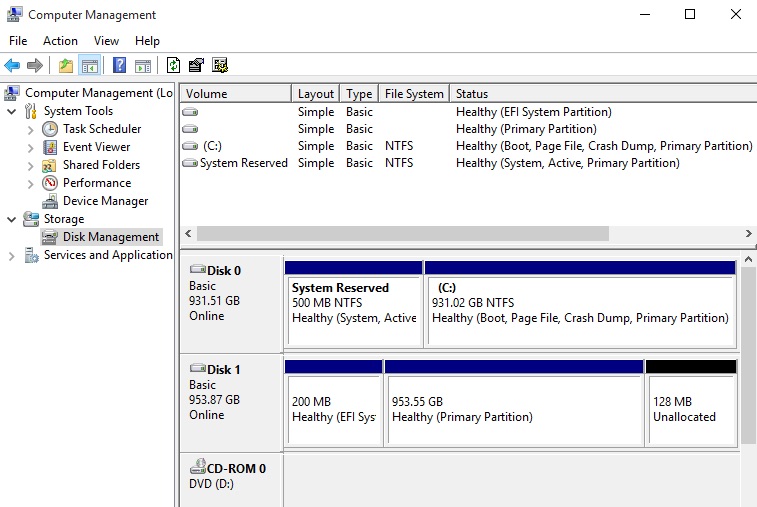
3. Find the CalDigit drive that you want to format in the list of drives. To verify the drive, you can right click on Disk number -> Properties. In the popup window, you will see the device information. Take CalDigit Tuff drive as an example, you should see "CalDigit Tuff Device".
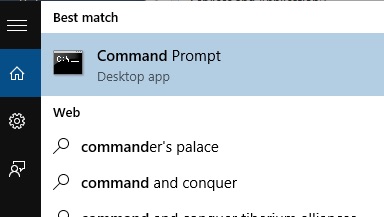
4. Launch DOS Command mode from Windows.
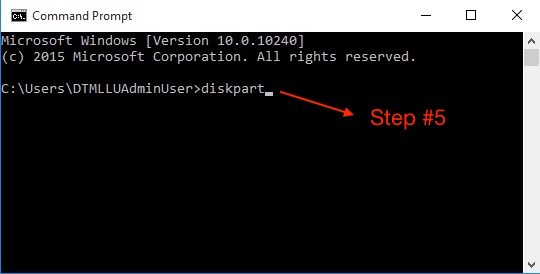
5. Type a command called "diskpart" and hit enter. This launches the diskpart command-line utility used for advanced disk partitioning tasks. You’ll see the prompt change to “DISKPART” afterward.
6. In DiskPart prompt, type list disk, then press enter. Doing so will display a list of all hard drives attached to the system, the size of the disks, and the disk number assigned. Note the disk number of the CalDigit drive with the 200MB EFI partition. If you used the Disk Management to find this number earlier in step 3, it should be the same number.
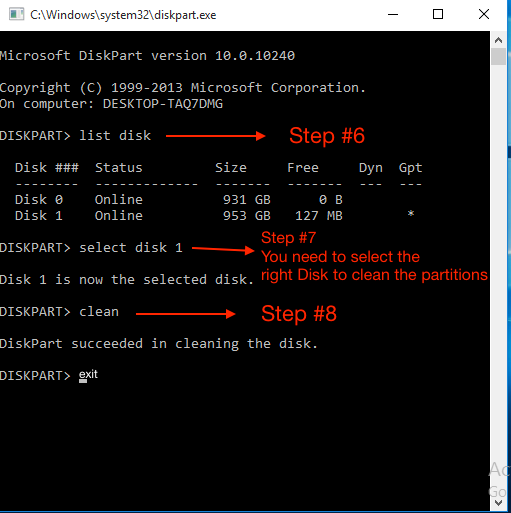
7. Select the drive you want to partition. In this example, we type in "Select Disk 1" and hit enter. Be very careful that you select the correct disk number. You wouldn’t want to accidentally wipe the wrong disk.
8. Type in a command called "clean" and hit enter. This “cleans” all partition information from the selected drive, effectively wiping it and turning it into one big, unpartitioned chunk of space.
9. Type "exit" to quit the DiskPart command mode.
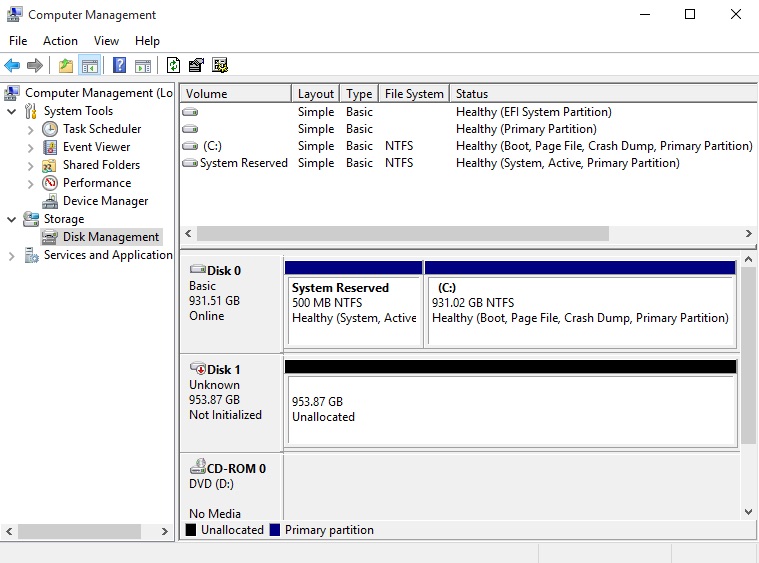
10. Now back to Windows Disk Management, you will see the drive becomes a big chunk of “Unallocated” space.
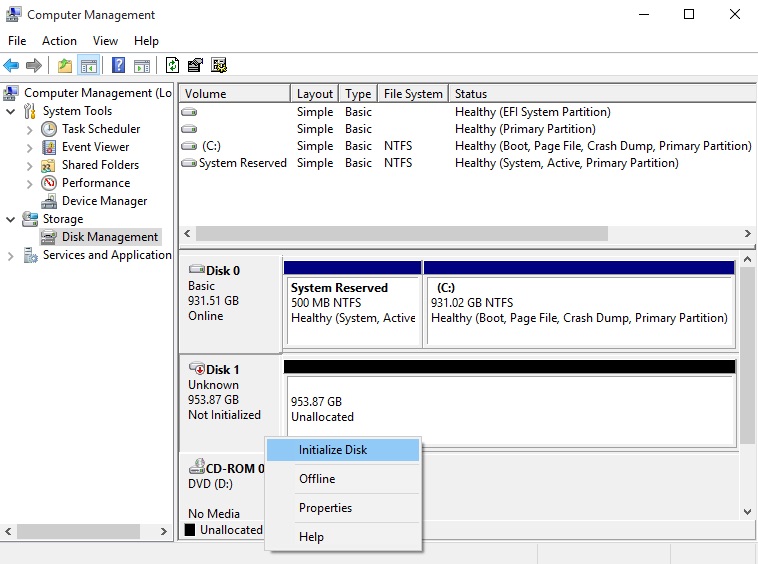
11. Right-click the Disk Number and select “Initialize Disk.”
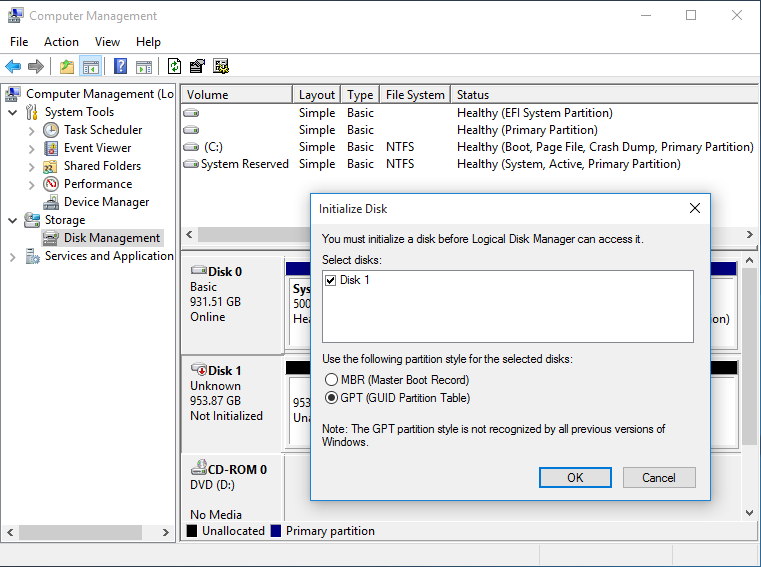
12. Choose either the GPT or MBR partition style for the disk.
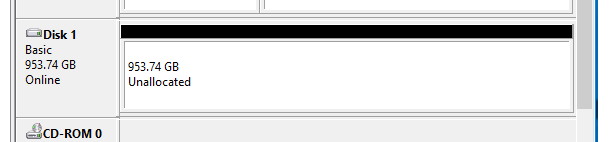
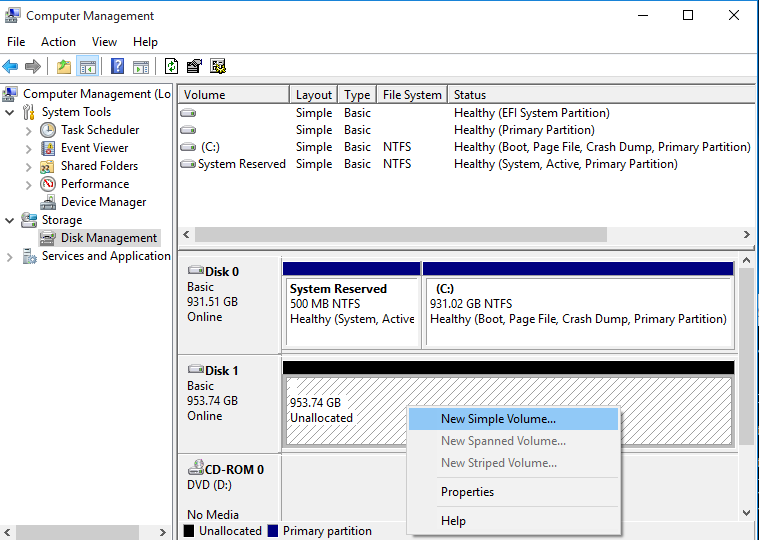
13. After drive initialization, right click on "Unallocated" area and choose "New Simple Volume..." to format the new volume. Follow the pop-up Wizard to finish the drive format.
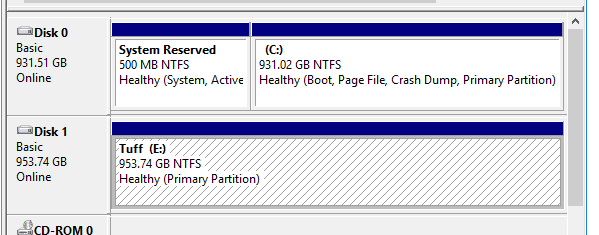
14. The new drive volume with full drive capacity will mount on your Windows system.
|
Additional Information:
DiskPart command
|
|
Keywords : diskpart, EFI partition, Windows format, Tuff
|
|
|
|
