Support - CalDigit Online Troubleshooting Knowledge Base
|
|
First Published: 8/19/2010 Last Modified: 8/19/2010 Last Modified by: AC
Article ID:97
|
Products Affected:
AV Drive & AV Pro
|
MAC OS X
1. To reformat your AV Drive, open Apple Disk Utility. Apple Disk Utility can be found in the
Utilities folder, located in Applications in Mac.
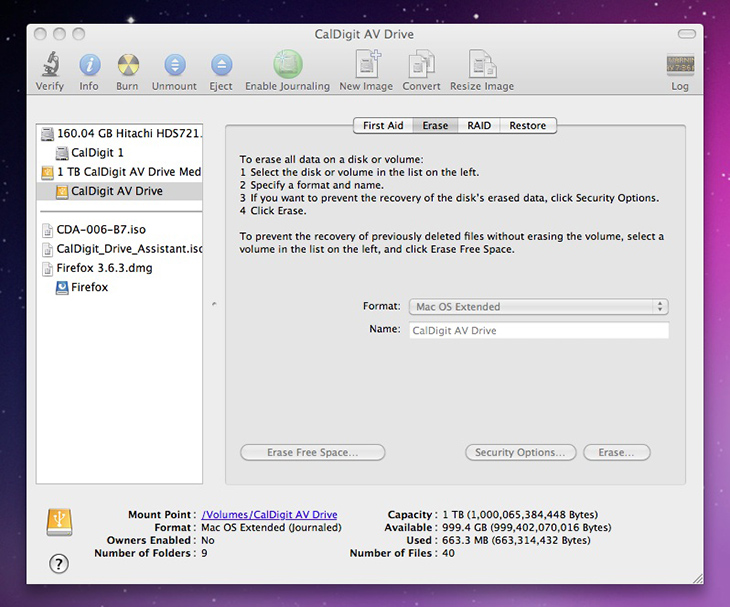
2. In Apple Disk Utility, select the AV Drive in the left hand column and select the "Erase" tab to
view formatting options.
2a. By default, the Format is set to Mac OS Extended, which is best for media storage
and performance. If you intend to use the AV Drive with Time Machine or to create a
separate bootable version of OS X, set the Format to Mac OS Extended (Journaled).
3. Click the "Erase" button. The Erase button can be found at the bottom right of the window.
4. When the dialog box appears, confirm your selection by clicking "Erase". Once the process is
finished, the AV Drive will have been reformatted.
WARNING: Clicking Erase will erase all data on your drive.
Windows
1. Right Click on My Computer and select "Manage" and then select "Storage".
2. Select "Disk Management".
2a. Select the appropriate "AV Drive" disk volume. If you are reformatting from the factory
Mac OS format, right click on the volume in the upper pane and click "Delete Volume".
3. Select the "Unallocated" volume in the lower pane and select format. The formatting wizard
will guide you through the process. If you would like to select a letter designation for your AV
Drive, you can select one in the box.
4. Select which format you would like to use and enter a volume name. Then check
the "Perform A Quick Format" box, then click next.
NOTE: Doing so will erase all data on your drive.
5. Confirm your selections and click "Finish". The CalDigit AV Drive is now ready for use.
|
|
|
|
