Support - CalDigit Online Troubleshooting Knowledge Base
|
|
First Published: 8/19/2010 Last Modified: 8/19/2010 Last Modified by: AC
Article ID:98
|
Products Affected:
AV Drive & AV Pro
|
- The CalDigit AV Drive is Mac and PC friendly. To format your AV Drive for cross-platform use, format the drive "FAT32". Another alternative is to install software such as "MacDrive" or "Paragon" onto your Windows machine. MacDrive and Paragon will allow you to mount Mac formatted drives onto your Windows machine.
NOTE: There is a 4 Gig file size limitation when using FAT32.
To format using "FAT32", follow these steps:
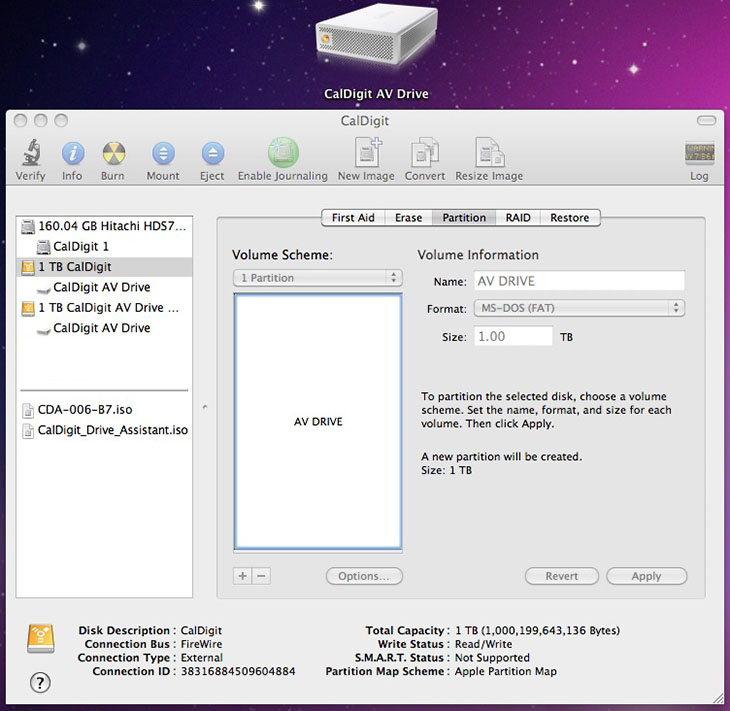
Mac OS X
1. Open Apple Disk Utility, which is located in the Utilities folder in the Application Folder, and
select the "AV Drive", which will appear in the left hand column.
2. Click the "Erase" button, which can be found at the top of the dialog box.
3. In the Format drop down menu, select "MS-DOS FAT32".
NOTE: FAT32 does not support more than 11 characters in the drive name. It may be necessary to rename the drive.
4. Click the "Erase" button in the left right corner of the dialog window.
5. Confirm your selection by clicking "Erase" in the new dialog window that appears.
NOTE: Clicking "Erase" will erase all data from the drive.
6. After format is complete, you can exit Apple Disk Utility. You will need to restore the AV Drive icon. For more information on this this procedure, refer to FAQ: How do I restore my AV Drive icon?
The AV Drive is now formatted for cross-platform use.
Windows
To partition a drive in Windows, please follow these steps:
1. Make sure the drive is on and connected with your host machine.
2. Open the Disk Management. (Location: My Computer > Control Panel > Administrative Tools
> Computer Management > Disk Management), then locate the new drive.
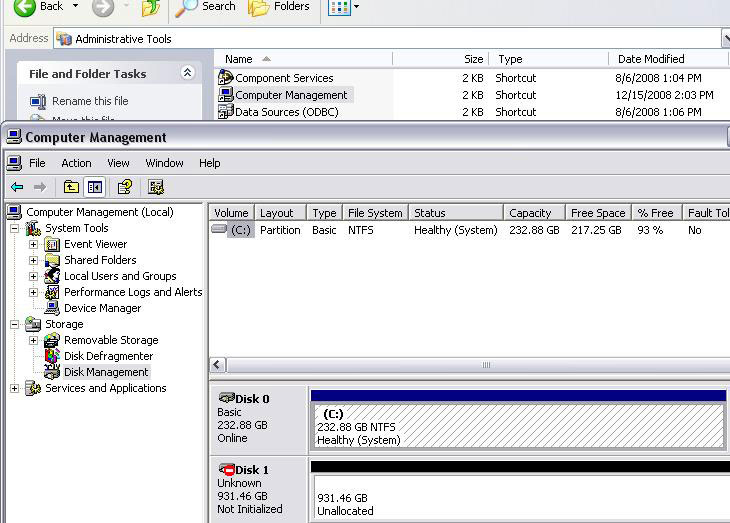
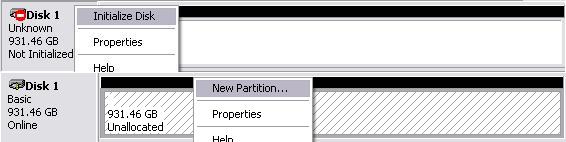
3. Initialize and Partition the new drive.
4. Choose specific settings for your new drive. Recommended: Primary partition > Partition size
in 30000MB or lower (30GB or smaller) > Default drive letter assign > Perform a quick format
enable.
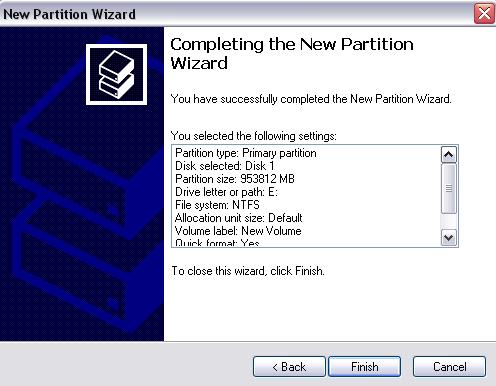
5. Verify the new drive in My Computer. The AV Drive is now ready to use.

|
|
|
|
