Support - CalDigit Online Troubleshooting Knowledge Base
|
|
First Published: 8/26/2009 Last Modified: 8/26/2009 Last Modified by: LL
Article ID:50
|
Products Affected:
HDPro & HDPro2, HDOne, CalDigit RAID Card, HDElement
|
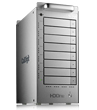
HDPro:
 
ATTENTION ! ! If you are using the HDPro for storage purpose, please follow these steps:
Before installing the new OS. . .
1. As always, backup the most important data to another location.
2. Use the RAIDShield to update the System Code (2.0.2) / Boot Code (2.0) for the CalDigit RAIDCard.
- 2a. The instruction for firmware update is available at: Page 31 @ RAIDShield Manual (The actual firmware files appear different from the manual)
- 2b. The System Code (2.0.2) and Boot Code (2.0) are available at the "System Code" and "Boot Code" folders in HDPro/HDOne/RAID Card/Mac_v2.0.2. Please make sure the choose the correct firmware for your device.
- 2c. If you have more than one HDPro, please make sure to update the firmwares on all HDPros.
3. Restart the computer, and make sure the firmware being updated.
4. Shutdown the computer, and turn off the HDPro.
5. Perform the installation / update for the Mac OSX 10.6. Do NOT turn on the HDPro during the installation.
6. When the OSX 10.6 is up and running, please install the 'CalDigit_IP_MAC_2.0.2_x64.mpkg' in the "Mac Installer" folder. (The files are located in the HDPro/HDOne/RAID Card/Mac_v2.0.2)
7. When the installation is completed, please restart the computer.
8. Please turn on the HDPro and computer. The update process is now completed.
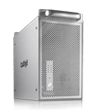
HDOne:
ATTENTION ! ! If you are using the HDOne for storage purpose, please follow these steps:
Before installing the new OS. . .
1. As always, backup the most important data to another location.
2. Use the RAIDShield to update the System Code (2.0.2) / Boot Code (2.0) for the CalDigit RAIDCard.
- 2a. The instruction for firmware update is available at: Page 31 @ RAIDShield Manual (The actual firmware files appear different from the manual)
- 2b. The System Code (2.0.2) and Boot Code (2.0) are available at the "System Code" and "Boot Code" folders in HDPro/HDOne/RAID Card/Mac_v2.0.2. Please make sure the choose the correct firmware for your device.
- 2c. If you have more than one HDOne, please make sure to update the firmwares on all HDOnes.
3. Restart the computer, and make sure the firmware being updated.
4. Shutdown the computer, and turn off the HDOne. (Hold down the power button, and make sure the blue power light's off.)
5. Perform the installation / update for the Mac OSX 10.6. Do NOT turn on the HDOne during the installation.
6. When the OSX 10.6 is up and running, please install the 'CalDigit_IP_MAC_2.0.2_x64.mpkg' in the "Mac Installer" folder. (The files are located in the HDPro/HDOne/RAID Card/Mac_v2.0.2)
7. When the installation is completed, Please shut down the computer.
8. Please turn on the HDOne and computer. The update process is now completed.
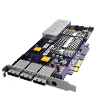
CalDigit RAIDCard: (Internal RAID array only)
ATTENTION ! ! If you are using the CalDigit RAIDCard with the MacPro internal hard drives for storage purpose, and the Opearting System is NOT on any of these internal hard drives (or you are using the CalDigit RAIDCard's "Bootcamp" feature). Please follow these steps:
Before installing the new OS. . .
1. As always, backup the most important data to another location.
2. Use the RAIDShield to update the System Code (2.0.2) / Boot Code (2.0) for the CalDigit RAIDCard.
- 2a. The instruction for firmware update is available at: Page 31 @ RAIDShield Manual (The actual firmware files appear different from the manual)
- 2b. The System Code (2.0.2) and Boot Code (2.0) are available at the "System Code" and "Boot Code" folders in HDPro/HDOne/RAID Card/Mac_v2.0.2. Please make sure the choose the correct firmware for your device.
3. Restart the computer, and make sure the firmware being updated.
4. Shutdown the computer, and remove the 4 internal hard drives.
-4a. If you are using the CalDigit RAIDCard's "Bootcamp" feature, please remove the non-OS hard drives only.
5. Perform the installation / update for the Mac OSX 10.6. Leave the internal hard drives unplugged.
6. When the OSX 10.6 is up and running, please install the 'CalDigit_IP_MAC_2.0.2_x64.mpkg' in the "Mac Installer" folder. (The files are located in the HDPro/HDOne/RAID Card/Mac_v2.0.2)
7. When the installation is completed, please shut down the computer.
8. Please put the 4 internal hard drives back into the MacPro. The update process is now completed.

ATTENTION ! ! If you are using the CalDigit RAIDCard with the MacPro internal hard drives for OS/storage purpose, and the Opearting System is on ONE of these internal hard drives. Please follow these steps:
Before installing the new OS. . .
1. As always, backup the most important data to another location.
2. Use the RAIDShield to update the System Code (2.0.2) / Boot Code (2.0) for the CalDigit RAIDCard.
- 2a. The instruction for firmware update is available at: Page 31 @ RAIDShield Manual (The actual firmware files appear different from the manual)
- 2b. The System Code (2.0.2) and Boot Code (2.0) are available at the "System Code" and "Boot Code" folders in HDPro/HDOne/RAID Card/Mac_v2.0.2. Please make sure the choose the correct firmware for your device.
3. Restart the computer, and make sure the firmware being updated.
4. Shutdown the computer, and remove the non-OS hard drives and the CalDigit RAIDCard.
- 4a. If you do not want to remove the CalDigit RAIDCard from the computer, please connect the internal MiniSAS (iPass) cable back to the motherboard.
- 4b. You could also install the OS hard drive on to an external bootable enclosure (Firewire or USB). The non-OS hard drives still have to be removed from the MacPro internal bays.
- 4c.You could also use the Carbon Copy Cloner to clone the entire operating system drive to an external bootable drive enclosure (Firewire or USB).
- 4d. For the CalDigit RAIDCard install / uninstall processes, please follow the installation video: 2007 MacPro / 2008 MacPro
5. Perform the installation / update for the Mac OSX 10.6. Leave the non-OS internal hard drives unplugged.
6. When the OSX 10.6 is up and running, please install the 'CalDigit_IP_MAC_2.0.2_x64.mpkg' in the "Mac Installer" folder. (The files are located in the HDPro/HDOne/RAID Card/Mac_v2.0.2)
7. When the installation is completed, please shut down the computer.
8. Please put the CalDigit RAIDCard and 4 internal hard drives back into the MacPro. The update process is now completed.
HDElement:
ATTENTION ! ! If you are using the HDElement for storage purpose and NO internal array on the CalDigit RAIDCard (only the HDElement(s) running the external RAID array), please follow these steps:
Before installing the new OS. . .
1. As always, backup the most important data to another location.
2. Use the RAIDShield to update the System Code (2.0.2) / Boot Code (2.0) for the CalDigit RAIDCard.
- 2a. The instruction for firmware update is available at: Page 31 @ RAIDShield Manual (The actual firmware files appear different from the manual)
- 2b. The System Code (2.0.2) and Boot Code (2.0) are available at the "System Code" and "Boot Code" folders in HDPro/HDOne/RAID Card/Mac_v2.0.2. Please make sure the choose the correct firmware for your device.
3. Restart the computer, and make sure the firmware being updated.
4. Shutdown the computer, and turn off the HDElement(s).
5. Perform the installation / update for the Mac OSX 10.6. Leave the HDElement(s) off.
6. When the OSX 10.6 is up and running, please install the 'CalDigit_IP_MAC_2.0.2_x64.mpkg' in the "Mac Installer" folder. (The files are located in the HDPro/HDOne/RAID Card/Mac_v2.0.2)
7. When the installation is completed, please shut down the computer.
8. Please turn on the HDElement and machine. The update process is now completed.

ATTENTION ! ! If you are using the HDElement and CalDigit RAIDCard (with the MacPro internal hard drives) for storage purpose (this apply on both separate and joint array), and the Opearting System is NOT on any of the MacPro internal hard drives (or you are using the CalDigit RAIDCard's "Bootcamp" feature), please follow these steps:
Before installing the new OS. . .
1. As always, backup the most important data to another location.
2. Use the RAIDShield to update the System Code (2.0.2) / Boot Code (2.0) for the CalDigit RAIDCard.
- 2a. The instruction for firmware update is available at: Page 31 @ RAIDShield Manual (The actual firmware files appear different from the manual)
- 2b. The System Code (2.0.2) and Boot Code (2.0) are available at the "System Code" and "Boot Code" folders in HDPro/HDOne/RAID Card/Mac_v2.0.2. Please make sure the choose the correct firmware for your device.
3. Restart the computer, and make sure the firmware being updated.
4. Shutdown the computer, take out the internal RAID array hard drives, and turn off the HDElement(s).
-4a. If you are using the CalDigit RAIDCard's "Bootcamp" feature, please remove the non-OS hard drives only.
5. Perform the installation / update for the Mac OSX 10.6. Do NOT put the internal hard drives back to the MacPro, and leave the HDElement(s) off.
6. When the OSX 10.6 is up and running, please install the 'CalDigit_IP_MAC_2.0.2_x64.mpkg' in the "Mac Installer" folder. (The files are located in the HDPro/HDOne/RAID Card/Mac_v2.0.2)
7. When the installation is completed, please shut down the computer.
8. Please put the internal hard drives back to the MacPro, and turn on the HDElement and machine. The update process is now completed.

ATTENTION ! ! If you are using the HDElement and CalDigit RAIDCard (with the MacPro internal hard drives) for OS and storage purpose (this apply on both separate and joint array), and the Opearting System is on ONE of the MacPro internal hard drives, please follow these steps:
Before installing the new OS. . .
1. As always, backup the most important data to another location.
2. Use the RAIDShield to update the System Code (2.0.2) / Boot Code (2.0) for the CalDigit RAIDCard.
- 2a. The instruction for firmware update is available at: Page 31 @ RAIDShield Manual (The actual firmware files appear different from the manual)
- 2b. The System Code (2.0.2) and Boot Code (2.0) are available at the "System Code" and "Boot Code" folders in HDPro/HDOne/RAID Card/Mac_v2.0.2. Please make sure the choose the correct firmware for your device.
3. Restart the computer, and make sure the firmware being updated.
4. Shutdown the computer, remove the non-OS hard drives and the CalDigit RAIDCard, then turn off the HDElement(s).
- 4a. If you do not want to remove the CalDigit RAIDCard from the computer, please connect the internal MiniSAS (iPass) cable back to the motherboard.
- 4b. You could also install the OS hard drive on to an external bootable enclosure (Firewire or USB). The non-OS hard drives still have to be removed from the MacPro internal bays.
- 4c.You could also use the Carbon Copy Cloner to clone the entire operating system drive to an external bootable drive enclosure (Firewire or USB).
- 4d. For the CalDigit RAIDCard install / uninstall processes, please follow the installation video: 2007 MacPro / 2008 MacPro
5. Perform the installation / update for the Mac OSX 10.6. Leave the non-OS internal hard drives unplugged, and do not turn on the HDElement(s).
6. When the OSX 10.6 is up and running, please install the 'CalDigit_IP_MAC_2.0.2_x64.mpkg' in the "Mac Installer" folder. (The files are located in the HDPro/HDOne/RAID Card/Mac_v2.0.2)
7. When the installation is completed, please shut down the computer.
8. Please put the CalDigit RAIDCard and non-OS internal hard drives back into the MacPro. The update process is now completed.
ATTENTION ! ! If you already updated (or in progress of updating) the OS X 10.6, and you are experiencing kernel panic during start up. Please follow these steps:
For HDPro / HDOne / HDElement: please turn off the unit, and follow the step 4 ~ step 8 (in its own section above) to complete the installation processes. Once the device is up and running, please update the firmware (see step#2).
For RAIDCard: please remove the RAIDCard from the computer, and follow the step 4 ~ step 8 to complete the installation processes. Once the device is up and running, please update the firmware (see step#2).
Bootable RAID:

ATTENTION ! ! If you are using the CalDigit RAIDCard with the MacPro internal hard drives for OS purpose, and the Opearting System is on more than 1 internal hard drives (such as RAID 5 or RAID 0 array); or you are using the HDPro / HDOne / HDElement as the boot up drive for the OS RAID array, and the OS is too "big" to be cloned on to an external bootable drive enclosure. Please CLICK HERE.
Notes:
The RAIDSHIELD software in software release v2.0.2 or above now can support both 32-bit and 64-bit Snow Leopard.
|
|
Keywords : 10.6, snow leopard, HDPro, HDOne, Kernel Panic
|
|
|
|
